
Using the NeoLucida
Ready to draw with your NeoLucida? Make sure you read the included instructions to learn how to properly set up and care for your NeoLucida.
What can I draw with the NeoLucida?
The NeoLucida is just like the French-made camera lucida “Chambre Claire Universelle” in this 1925 advertisement. Draw landscapes (“dessin de paysage”), portraits (“dessin de portrait”), and image copies—enlargements or reductions (“copie—agrandissement ou réduction”). Even though this advertisement doesn’t mention it, you can also draw still-lifes.
Making copies. Why limit yourself to drawing from life? You can use the NeoLucida to make copies of images. Cut out images from magazines, dig out old photographs, or even copy your own drawings! Position them vertically in front of your NeoLucida, adjust the lighting, and draw as you would for drawing objects.
Digital tools and copies. Take the NeoLucida into the 21st century. You can integrate digital tools into your drawing work-flow in two ways:
Do you like to draw on digital tablets? Maybe you have a Wacom drawing tablet or iPad Pro with the Apple Pencil. Dim the tablet screen and use it instead of paper. Life drawing straight to digital!
You can also draw from your computer screen. Set up your laptop with an image you like. Dim the screen to balance the lighting. Hand draw your favorite meme!
You can also use the NeoLucida outside! Here’s a short video showing a simple setup with a (somewhat modified) portable easel:
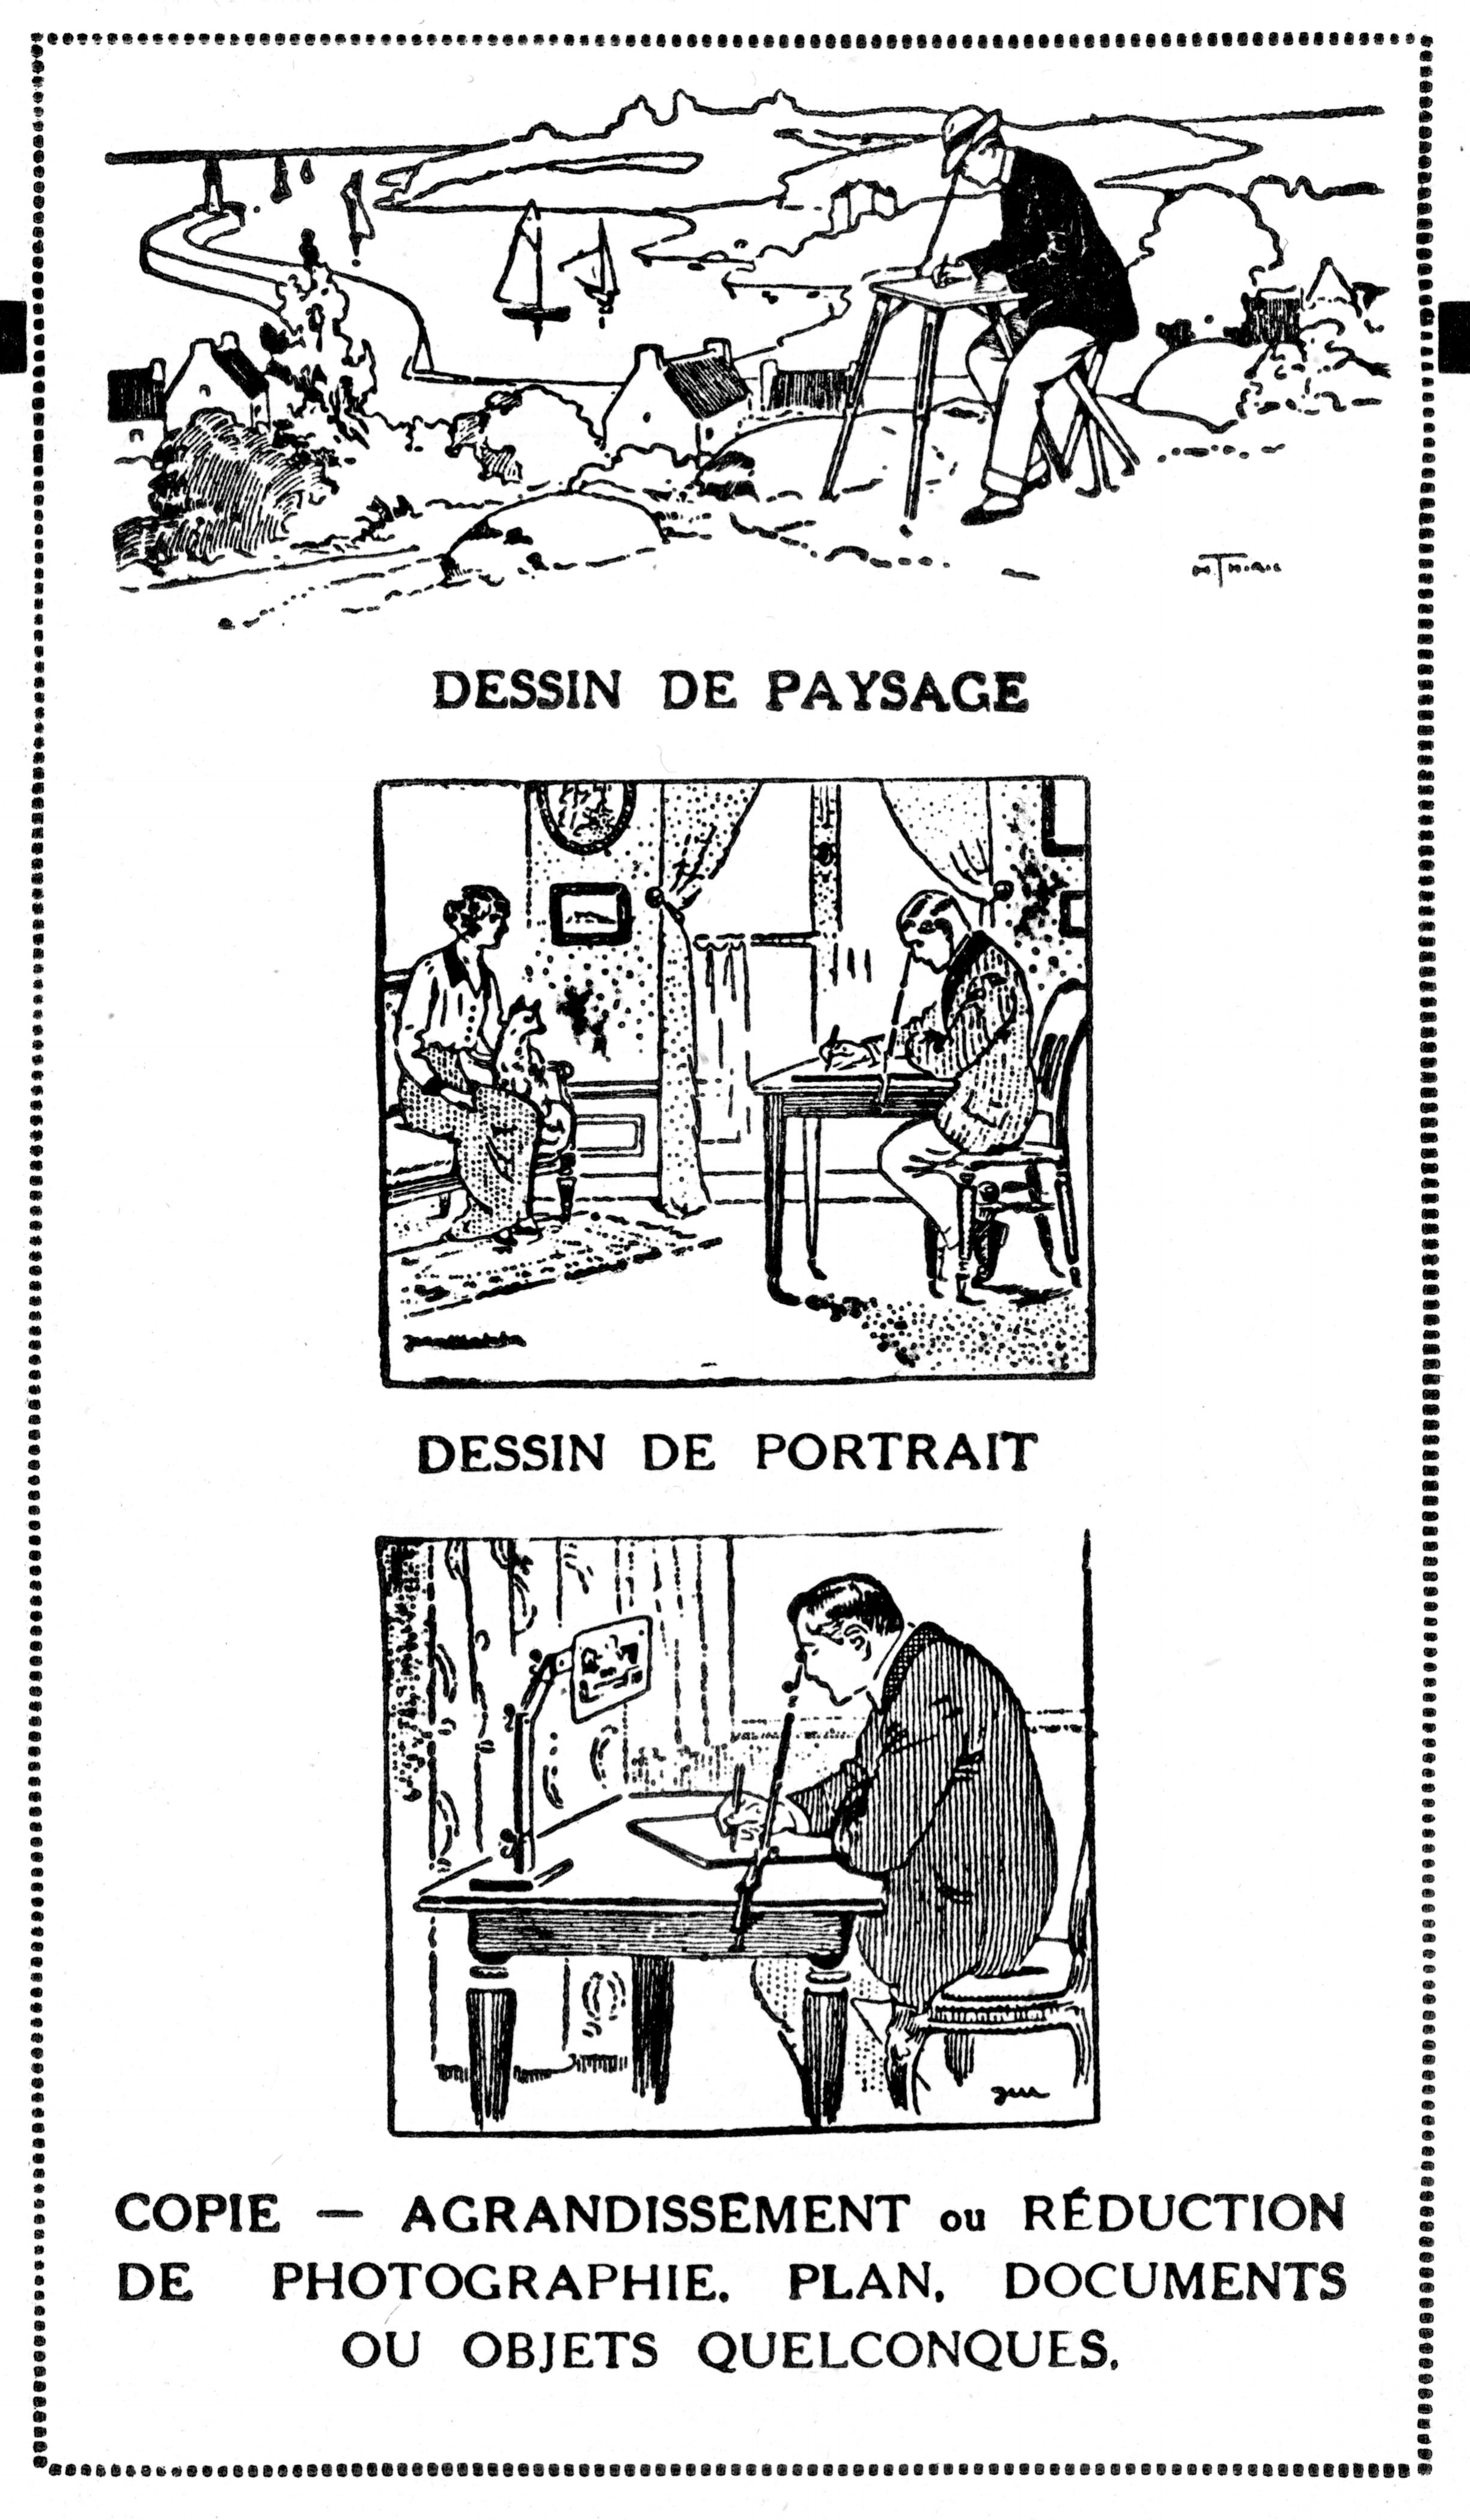
Chambre Claire Universelle, advertisement (1925)

The NeoLucida XL functions much like its predecessors: Clamp it to your table, place the eyepiece over your page and in front of your subject. When you look down into the eyepiece, you see a ghost image of your subject on your page. Trace what you see!
Animations and Flipbooks. Hand trace individual video frames to make a flip book or a hand-drawn animation. Pause the video, copy onto paper using the NeoLucida. Advance one frame, get a new sheet of paper, repeat. Scan your images and compile them in video software. Or print each image onto heavy paper or cardstock to make a flipbook.
This is an old process called rotoscoping used by animators trying to capture realistic motion. Disney, for example, rotoscoped a live actress to make Snow White come to life.

Drawing Tips
Draw lightly. Use a 2H or 4H pencil (harder leads for making lighter lines) or press very lightly with the pencil you have. You can go over the lines with darker media (graphite, ink, brush) after you have lightly marked out your subject. Learn to use the NeoLucida as a first-draft outlining tool, useful to make an underlay that can be finished with paint, watercolor, charcoal, ink; any medium you want to use.
Don’t draw everything you see. The ghost image you see has it all: color, light & shade, texture. Don’t try to draw it all. Start with basic outlines of the subject, lightly tracing edges and curves. With time, you’ll determine the best moment for you to stop using the NeoLucida and finish your drawing without it.
The Nose Problem. You’re using the NeoLucida to draw a portrait. Your subject is facing you, sitting still. Trace the eyes, the mouth, the chin and jaw. What about the nose? What lines do you draw? What do you leave out? The nose presents a problem for tracing. Most of the nose isn’t outline. It’s soft shades, subtle curves. Look away from the NeoLucida and look at the nose to shade or color. In some cases, tracing less will make for a better drawing after you put the NeoLucida away and fill in the rest by direct observation.
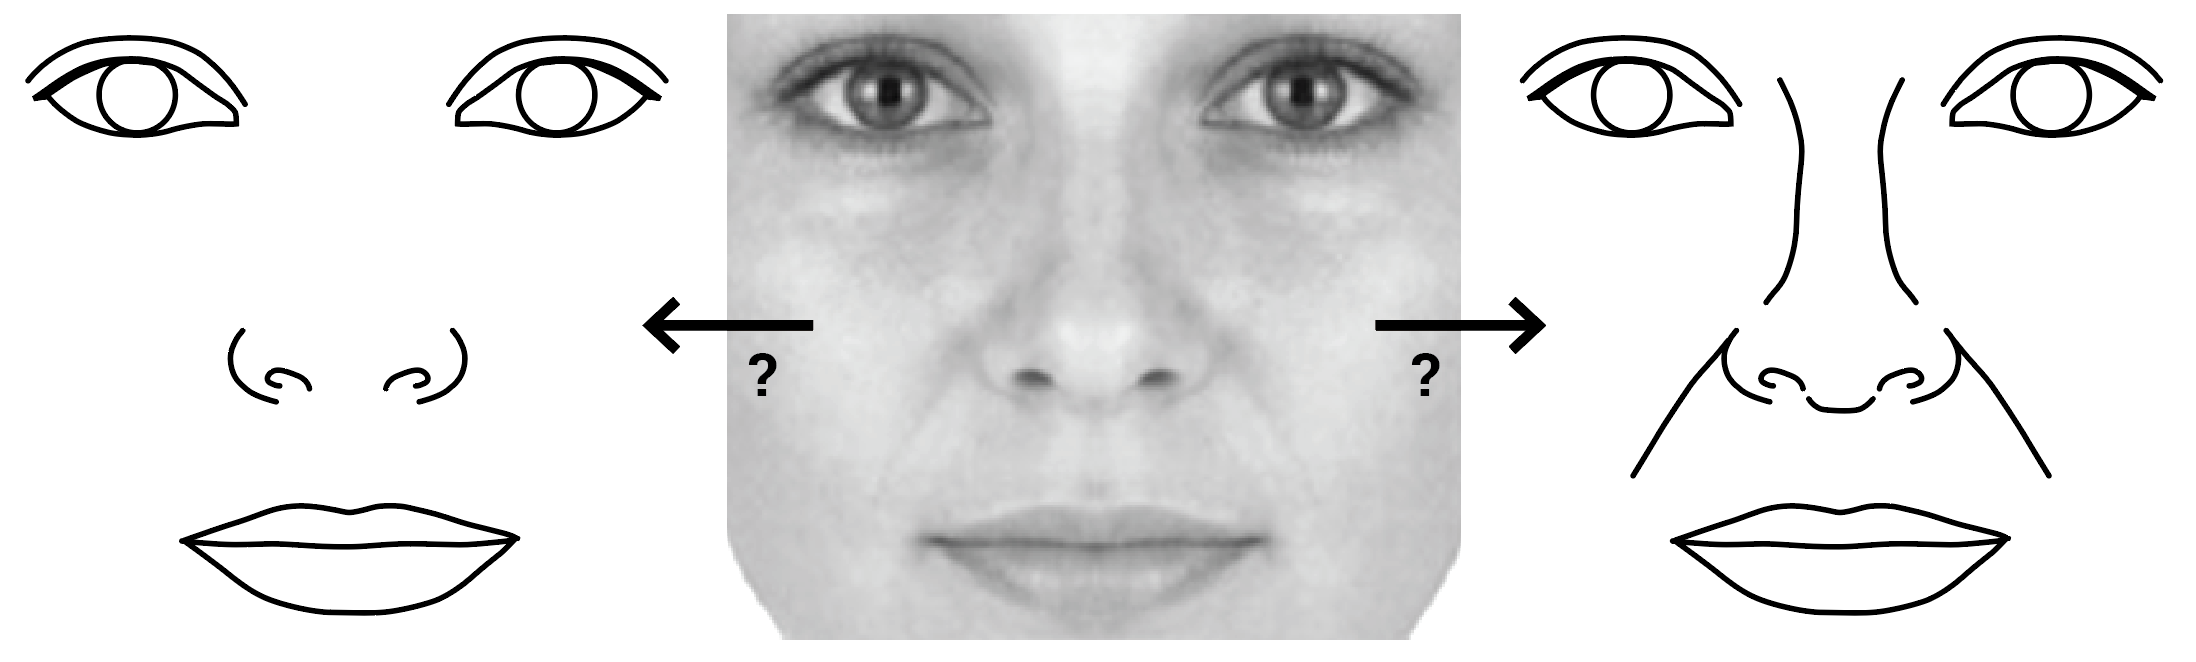
“The Nose Problem.” What lines do you draw? What do you leave out? What is best for the final drawing?
The more you use the NeoLucida, the less you use it.
It seems like a paradox. When starting out, you’ll spend a lot of time drawing while looking into the NeoLucida eyepiece, trying to trace everything you see. As your confidence in drawing grows, you’ll become more efficient. You’ll quickly make the most critical marks, outlining the important elements of the scene to establish the right proportions. Over time, you will only use the NeoLucida for a few minutes, then put it aside and finish the drawing—color, light, shade—by eye.
A little historical perspective: Skeptical scholars point out that there is no primary evidence to prove that artists like Jean-Auguste-Dominique Ingres (1780-1867) used devices like the camera lucida. If Ingres used an optical drawing tool—their argument goes—subjects sitting for portraits would have written about it in letters or other ephemera. It would be obvious he was using optical tools.
Ingres is, without question, one history’s great draftsmen and the subject of a lot of reverence and superhero worship. Did he use a camera lucida? If so, how could he “hide this secret” and “get away with it”? And does this mean he’s a cheater? Maybe people who reject ideas about artists using drawing technology misunderstand the artist’s working relationship with their drawing technology.
Imagine Ingres drawing a portrait. He sets up the camera lucida: a compact, delicate brass instrument clamped to his drawing table. He looks in, makes a few marks to get proportions correct, then looks up at his subject, then to his paper to draw. He occasionally looks down into the camera lucida to check his lines and work on other areas. Ingres likely knew what you will know after experience with the NeoLucida: it isn’t paradoxical to say that optical tools are both indispensable and hardly used. The more you use it, the less you use it.
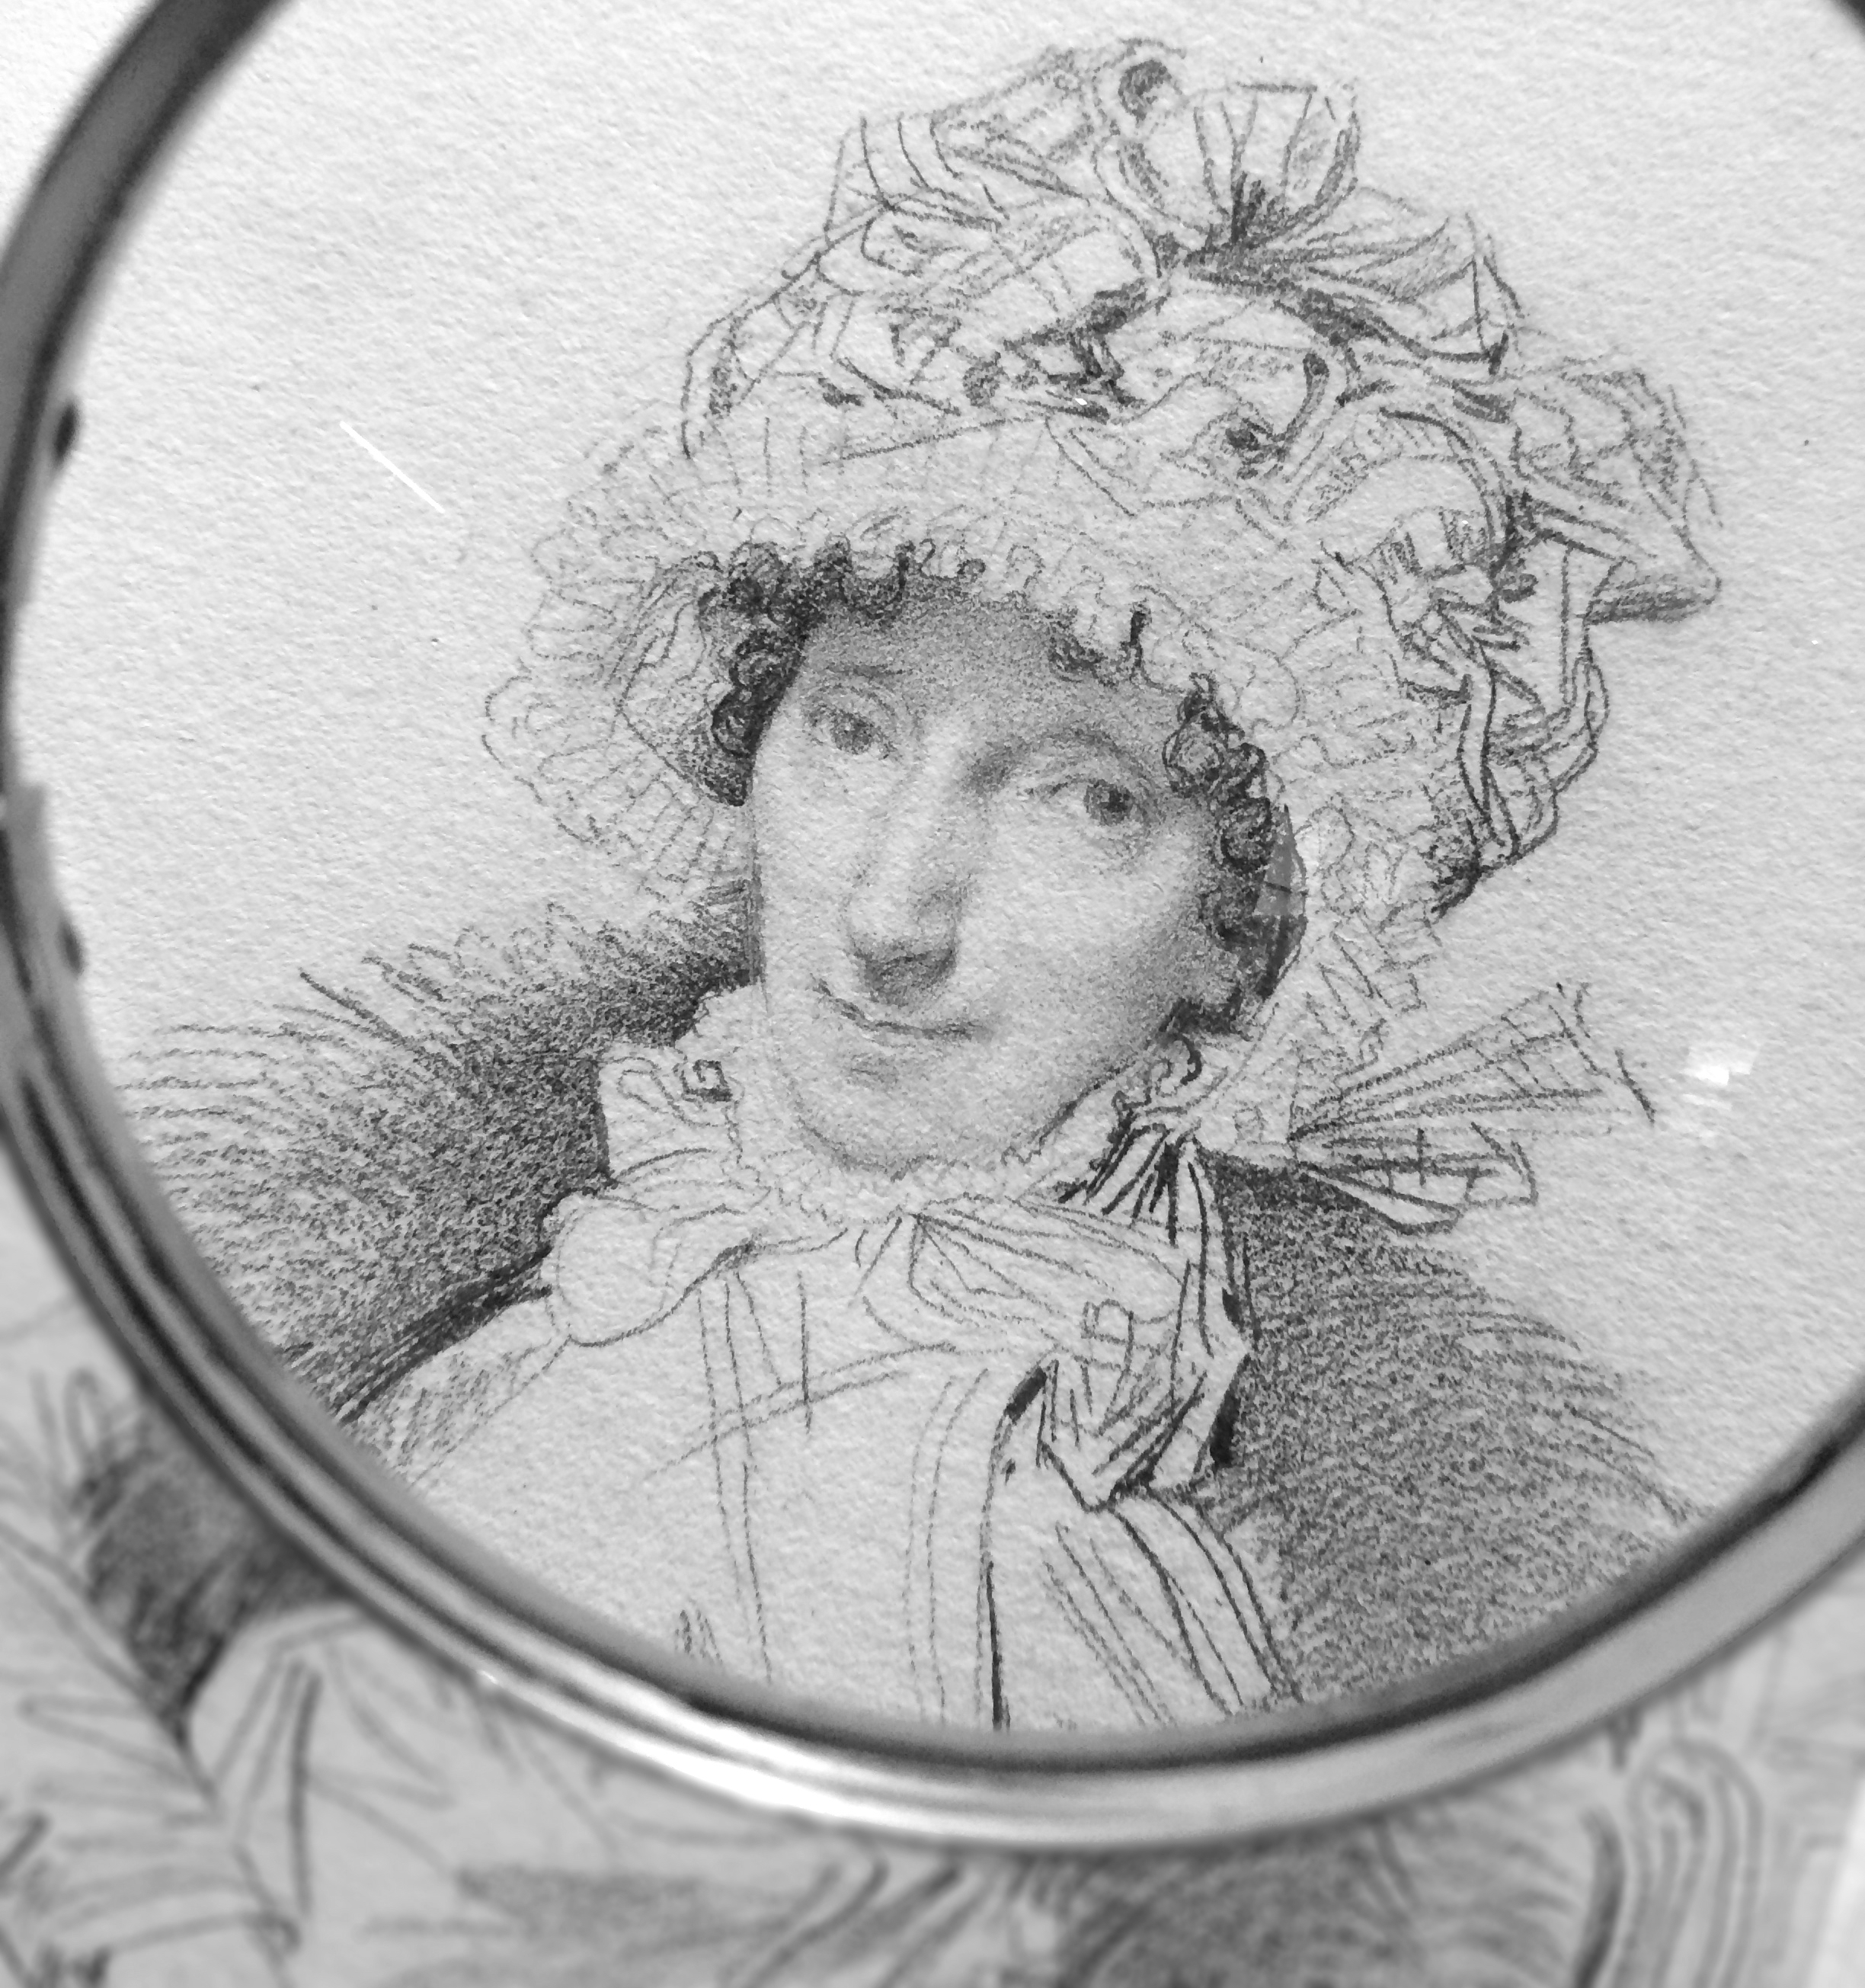
Portrait of Mrs. John Mackie, by Jean-Auguste-Dominique Ingres, 1816. Let’s say this drawing took an hour to complete. How much of that time did Ingres use his camera lucida? Maybe five minutes? It’s impossible to know for sure. Using a camera lucida for two decades tells me that skilled artists like Ingres would do most of a detailed drawing like this without optical aids.
(Photo taken by me through a magnifying glass while doing research at The Victoria & Albert Museum, London).
Know the Limits
Focus. The NeoLucida has no lens, so everything, no matter the distance, is in focus. You can draw a close-up bowl of fruit or distant mountains. However, a far-away mountain superimposed over your pencil 20cm away can cause eye fatigue. Your brain will work hard to reconcile two images at different distances. Take regular breaks to rest your eyes.
Sturdy table. Your subject and your paper should stay in steady alignment at all times for accurate tracing. Make sure you clamp the NeoLucida to a sturdy table. If your table edge is thicker than 50mm (2 in), clamp the NeoLucida to a drawing board. If necessary, use a woodworking clamp to secure the drawing board to the table. Don’t damage your table finish by over-tightening the clamp.
Viewing angle. If you look into the NeoLucida and your subject’s top or bottom is cut off, adjust the height of the eyepiece. Rotating the eyepiece doesn’t change the viewing angle. The NeoLucida and NeoLucida XL “see straight ahead.” raise or lower the eyepiece to center your subject.
Take a stand! Despite what the vintage advertisement above shows, it’s easier to use the NeoLucida standing up. You have to get your head completely over the eyepiece to fully see straight down into it. Most tables are too high—and chairs too short—to sit and get on top of the eyepiece. If it’s difficult for you to stand for long periods, use a bar stool or taller seats to raise your body higher.
Drawing from a seated position could lead to lowering the NeoLucida or NeoLucida XL, which makes your drawing smaller. (The distance from eyepiece to paper affects drawing size)
Can I make it big? To make larger drawings, increase the distance between the NeoLucida or NeoLucida XL eyepiece and your paper. Technically, the only limitation in size is the length of your arm: your eye has to stay at the eyepiece, and your hand has to hold the pencil on the page. For a person with average arm length, the largest drawing is about an A3/11x17” page.
Can I make it really big? You can’t make your arm longer, but you can use a longer pencil! Clamp the NeoLucida to a shelf or other stable high place. Tape a pencil to the end of a long stick or dowel. Put your paper on the floor and you have a much larger drawing. The largest drawing I have done? Over one meter (3.25 feet) square. My “pencil-stick” was over one meter long, and I was standing on a stool to get way up high over my paper on the floor. Pencil control at this distance is an issue, but I was able to get a usable outline of a posing figure model.
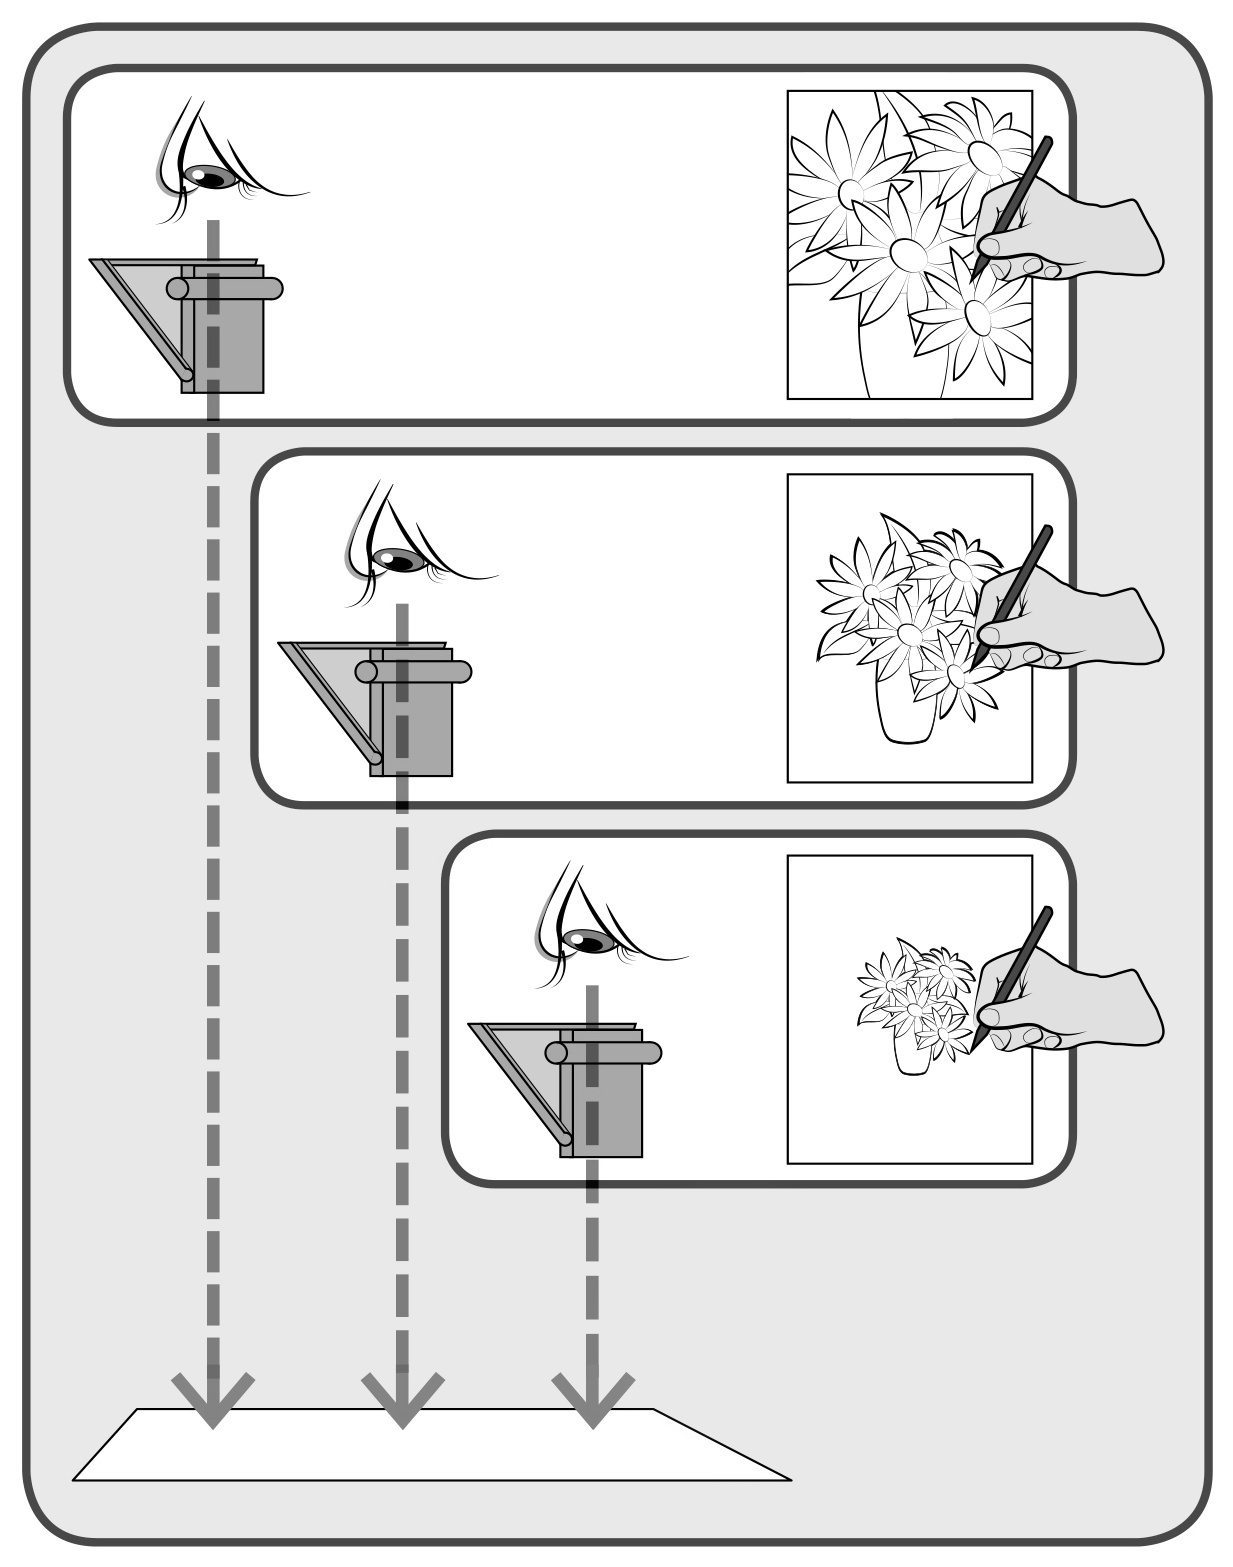
Change the size of your drawing by adjusting the height of the NeoLucida or NeoLucida XL eyepiece.
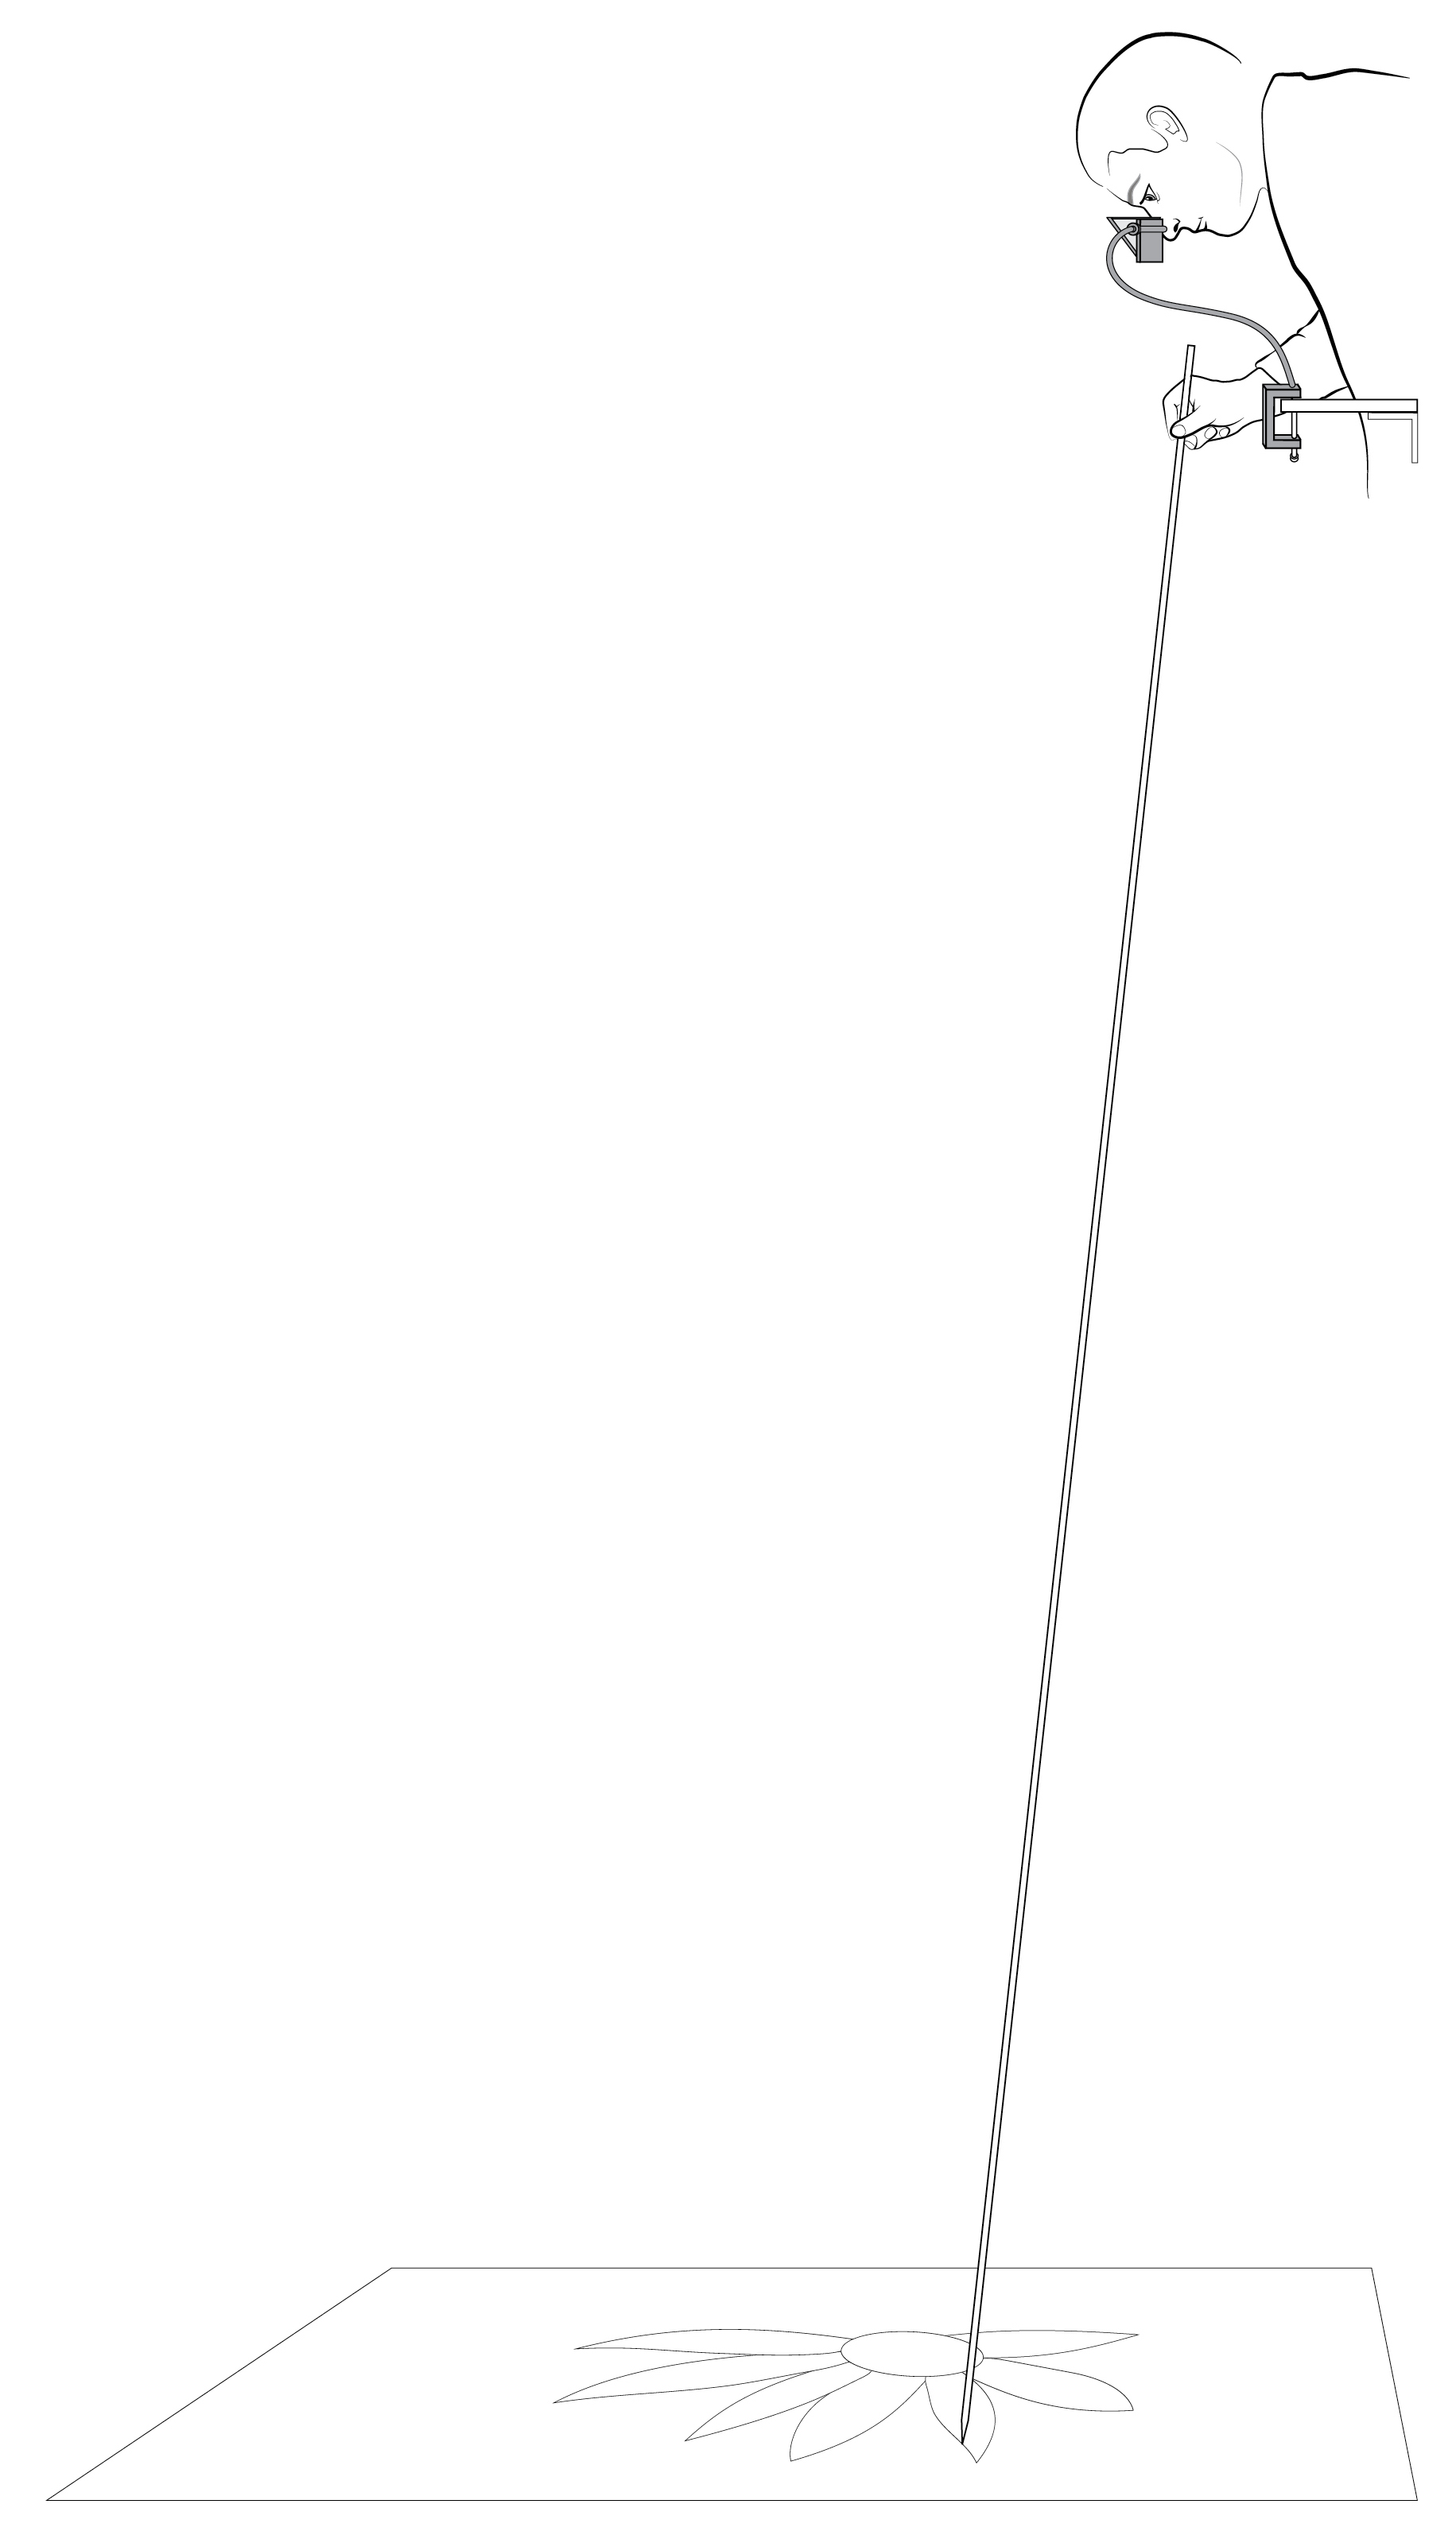
Long pencil = large drawing!